If you need to restore your system's Windows installation to the state it was originally when you received it, we have a guide for you!
For Windows 10 systems that were ordered in 2018 or later, use this guide: How to Use Restore from the USB Tools & Recovery Drive (2018 or Later)
For Windows 10 systems that were ordered in 2017 or earlier, use this guide: How to Use Restore from the USB Tools & Recovery Drive (2017 or Earlier)
This article will cover running a System Image Recovery using the discs that came with your Puget Systems computer. Note that this process will remove everything from your computer, including any files, any programs, anything on any disk connected to the computer, internal or external. You can exclude disks that are connected to the system, but keep in mind that any disks not explicitly excluded will have all data on them removed. Be very careful here, because you can accidentally format entire drives doing this. Save any important data from the primary drive (typically C:) and to be absolutely safe, it'd be a good idea to disconnect any other drives you don't want formatted. Definitely disconnect any external drives first.
You'll need to first have the Windows disc and the Puget Restore DVD. Both will typically be in the back pages of the binder that came with your computer. To start, you'll want to put the Windows disc in your computer and restart the computer. During startup, you'll get the "Press any key to boot from CD or DVD" screen. At this point I usually use spacebar or enter. There are a handful of keys that won't register, so that's the best way to go. Note that it goes by pretty quick. You might not notice it going past. If so, just press a key during startup to see if you can trigger it. You may need to restart if the system doesn't register the key or it goes by before you can press anything.
Once you've done that, it will bring up a Windows loading screen. Let that do its thing for a minute or two and eventually it'll come up to the localization screen below. Choose what you want and click Next.
As a side note, make sure you're plugged into the system using a wired keyboard and mouse into one of the black USB ports. The blue USB3 ports may not have drivers, so they may not work.
You'll be brought to the Install screen. DON'T CLICK INSTALL NOW! You're actually going to click where it says "Repair your computer" in the lower left corner of the screen.
This will bring you up to here. The system will scan for any existing installations. Note, it might prompt you that it can repair your Windows installation. If it does and you haven't tried it before, you might give it a shot, but it's not terribly successful. In most cases this just finishes scanning and leaves you with…
… this screen! It'll actually start with the "User recovery tools…" option marked. At this point, take the Windows disc out and swap in the Restore DVD. Click the "Restore your computer…" button and then click "Next".
You shouldn't get this screen, but if you do, first hit "Retry". It might need a second to scan the disc. Make sure you have the Restore DVD in the drive. Also make sure it's clean and make sure you have it so that the disc label is facing up. In addition, Microsoft uses an odd number scheme for this utility. So if your system came with multiple restore DVDs (they'll be numbered), try one of the other restore DVDs. If you're still seeing this screen after trying those steps, then you'll want to contact us.
You'll typically see something like this. This is just indicating that it found the image. Go ahead and click "Next".
You will arrive at this screen. This one's important. Note that you won't need to click the "Install drivers…" or "Advanced…" buttons. Those aren't typically needed. What you will want to do is check the "Format and repartition disks" button. Sometimes this will automatically be checked and will be grayed out. If so, continue on to the next step.
With that checked, the "Exclude disks…" button becomes available. Click on it.
You'll get the screen below. You'll notice that in the example given, there is only one drive listed. In which case, I'd just click "OK". If you have more drives, make sure to check every drive you DO NOT want formatted. Any unchecked drives will be formatted and everything on them will be removed. You need to make sure that your primary drive is unchecked, as it will be needed to do the image restore. If you have any important data on your primary drive, stop and back it up first. After selecting the drives you do not want backed up, click "OK".
You'll be brought back to this screen. Click "Next".
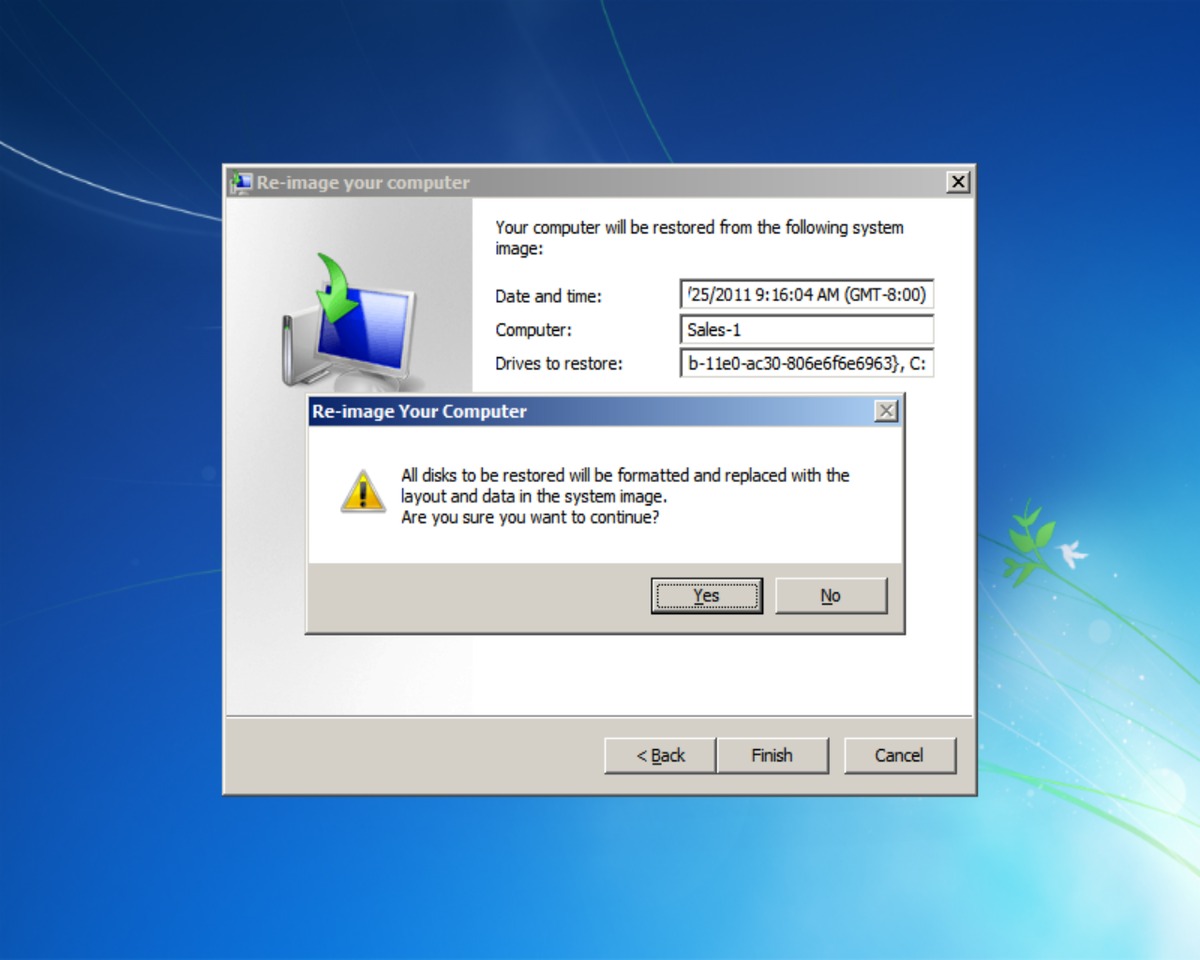
You'll be brought to this screen. You'll notice that the "Drives to restore:" field has a bunch of gibberish in it. That's just a type of ID for your disk drive. Go ahead and click "Finish".
You'll get a prompt here warning that the image will be formatting and replacing the disks to be re-imaged. Click "Yes" here.
And away we go! The re-imaging processing is starting now. At this point, I typically recommend just letting this do its thing. Come back to it every fifteen minutes or so to check on it. Note that if you're using an image with multiple DVDs you will get a popup.
If so, it'll look something like this. If this happens, just swap the Restore DVDs. Click "OK", let it scan, and it'll continue on its merry way. It's common for this to happen right near the beginning of the re-image process and then again near the end.
So that's it! Hopefully this has been helpful in illustrating the system re-image process. There are only a couple more notes I'd like to make.
First off, you'll probably need to reactivate Windows after you reboot. If so, just bring up the Start menu and in the search box that comes up, type in "Activate Windows". You'll get the option to do so in the menu. Secondly, you'll want to update Windows itself. Just run Windows Update and you should be good to go!