Table of Contents
What’s the point of this article?
Well, the end is nigh, what a bummer right? So what do we do about it? With Microsoft officially ending all support for Windows 7 on January 14th, 2020 millions of users will no longer have access to critical security updates, feature releases or any kind of technical support. These updates are designed to help protect your PC from intrusion, viruses, malware and instability and will completely cease meaning your risk will exponentially increase every day after January 14th. Microsoft's recommendation is to "Move to a new PC running Windows 10" and while this is our best recommendation as well, we also understand this may not be an acceptable solution. New systems can be a cost you may not be ready for.
There are a number of ways to handle this and our recommendations are targeted very intentionally toward our customers, most of whom utilize their systems for business operations. Security and stability are such a high priority here at Puget Systems that we want to make sure you are not only fully protected during the switch but also have a litany of options to pick from to hopefully avoid interruption to your workflow and limit your overall downtime. In this article we will discuss a few options you have but be warned, none of the options we will recommend include staying in Windows 7. Instead we will discuss backing up your data, preparing to install Windows 10 and the best way to install Windows 10 on your computer.
The primary concern for most users will be the driver and hardware support as much of the hardware from the days of Windows 7 is considered 'legacy' and will not have driver support. Microsoft made a commitment to provide 10 years of product support for Windows 7 meaning many of our systems out there will be very old in terms of technology.
The first step is backing up your data, then we will install Windows 10 followed by restoring your data to the newly installed Operating System. Because you cannot back up software or applications you will need to document which applications you currently have installed and plan to reinstall them after moving to Windows 10. You should track down any install CDs, software keys and/or any registration information pertaining to the software you wish to reinstall just in case it is needed when reinstalling your software into Windows 10.
OneDrive backup option
Install and set up OneDrive on your Windows 7 PC:
1. Install the Windows version of the new OneDrive sync client found HERE
2. Start OneDrive setup by opening the downloaded file "OneDriveSetup.exe"
3. If you do not already have a Microsoft account, sign up for one they're free! This will give you access to a litany of functions but the one we are most concerned with is obviously Microsoft OneDrive
4. Follow the setup utility and leave all options as default
5. In the notification area, at the far right of the taskbar, right-click the OneDrive white cloud icon and then select "Settings". You may need to click the "Show hidden icons arrow" ( ^ ) next to the notification area to see the OneDrive icon
6. On the "Backup" tab, click "Manage Backup"
7. You will now see a "Set up protection of important folders" dialog, select all folders that have information you wish to back up
8. Click "Start Protection"
9. Check the OneDrive icon in the notification area on the far right of the taskbar to verify OneDrive is currently uploading files. Do not disconnect your PC from the internet until the icon says "Up to date"
Backup and Restore option
– External USB drive
– External SD card
– External Hard drive
Backing up files from Windows 7 PC
1. Select the Start button, then select Control Panel > System and Security > Backup and Restore
2. Select "Set up backup"
3. Connect your external storage device to your Windows 7 PC then select "Refresh"
4. Under Backup Destination, select your external storage device then select "Next"
5. Click Let me choose > Next
6. By default, all files within Documents, Music, Pictures and Videos will be backed up. You can back up additional files by expanding the locations under "Computer" and selecting the folders you wish to back up
7. Unselect the "Include a system image of drives" checkbox and then select "Next"
8. Select "Change schedule"
9. Unselect the "Run backup on a schedule" checkbox and click "OK"
10. Click "Save settings" and run backup to start backing up your files to the external storage device
11. Once the backup has completed you can remove the external storage device. In Windows 7, make sure you select "Eject" before you disconnect the drive
External device Copy option
Copying files to an external device
1. Connect your external storage device to your Windows 7 PC
2. Select the Start button > Computer
3. Locate the files or folders you wish to copy
4. Select all files/folders while holding the CTRL key on the keyboard
5. Files and folders will now be highlighted. At the top of the window, select "Organize > Copy", this will copy files to internal memory temporarily
6. Navigate to your external drive and select it
7. With the drive highlighted, select "Organize > Paste" This will copy the selected files/folders to the external device
Installing Windows 10
We highly recommend following this guide when installing Windows 10. The guide explains the various steps to fully delete all content from your existing Operating System (OS) drive and install a new version of Windows 10. We do not recommend performing a Windows 10 'upgrade' as typically upgrades do not work correctly and cause many problems. We have seen that valid Product keys for previous editions of Windows will activate when used with Windows 10, but we haven't heard anything official from Microsoft. If you have any reservations about using an older Product key, then we can help you purchase a new Windows 10 key.
Installing Windows 10 with a Microsoft Windows 10 USB key
Post Windows 10 install – OneDrive option
Once Windows 10 is installed you will be provided the option of signing in with your Microsoft account. Sign in with the same Microsoft account you used to set up the OneDrive backup and your data will copy safely.
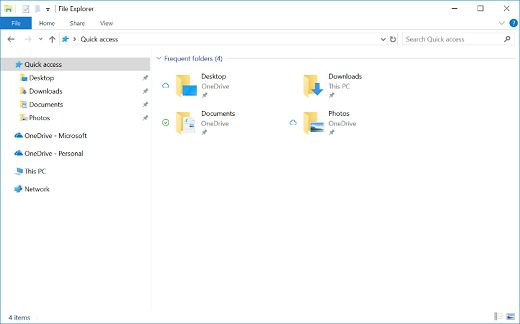
Clicking "Next" all the way through the Windows setup, including the step "Protect your files with OneDrive" will allow the data from your OneDrive to copy down into your new Windows 10 installation. The copy will take some time however you should be able to view your files in File Explorer after setup finishes. All files from Desktop, Documents, and Pictures folders on your Windows 7 PC will now appear automatically in those corresponding locations within your Windows 10 PC.
Post Windows 10 install – Backup and Restore option
Restore files on a Windows 10 PC
1. Connect the external storage device with all your data
2. Select the Start button then click "Settings"
3. Select "Update & Security > Backup > Go to Backup and Restore (Windows 7)"
4. Click "Select another backup to restore files from"
5. Select the backup created from your Windows 7 PC and then click "Next"
6. Click the "Select all files from this backup" checkbox and then click "Next"
7. By default all files from the backup will be restored to the same location on the Windows 10 PC. You may choose a different location to move the files by selecting "In the following location" and then choosing the path to a new destination
8. Select "Restore" to start restoring files to the Windows 10 PC
Post Windows 10 install – Copy option
Copying files from external storage device
1. Connect your external storage device with all your data
2. Select "File Explorer" from the task bar
3. On the left guide bar, select "This PC"
4. Locate the external drive and double-click
5. Navigate to the folder where your files are stored then double-click
6. To select all files in this location, select "Home" in the top left and then click "Select All". At this point all files and folders will be highlighted.
7. Select the "Home" tab in the top left then click "Copy" then when prompted select the folder you would like files copied to: Documents, Music, Pictures, or Videos. You could also choose a custom location by selecting "Choose location"
Need help with your Puget Systems PC?
If something is wrong with your Puget Systems PC. We are readily accessible, and our support team comes from a wide range of technological backgrounds to better assist you!
Looking for more support guides?
If you are looking for a solution to a problem you are having with your PC, we also have a number of other support guides that may be able to assist you with other issues.