If you need to restore your system's Windows installation to the state it was originally when you received it, we have a guide for you!
For Windows 10 systems that were ordered in 2018 or later, use this guide: How to Use Restore from the USB Tools & Recovery Drive
For Windows 7 systems with recovery DVDs, use this guide: How to Restore Using Windows 7 System Image Recovery
One of the cooler features of your Puget Systems computer is the USB Tools & Recovery Drive. All of our Windows 8 and 10 systems come with one, and it's a nice little unit. It includes testing utilities for your RAM and disk drives, as well as a bootable Linux environment. It also has a great feature to restore your system to its original configuration as it shipped from Puget. This article covers how to use it. Unfortunately, due to the way it works, the Restore utility requires a few steps to get working. Luckily, we've got this guide here showing how to go about using it!
Before anything else, keep in mind that using the restore will require deleting the primary and system partition for your Windows drive. Make sure to backup your system before doing this.
I'm going to take a moment here to explain why we use this method. If you're not interested, go ahead and skip to below the line.
The way we have our restore image setup, it actually uses the built-in Windows installer to copy the restore image over to the system. This makes it generally more adaptable. If you can boot the Windows installer on a system, you can restore the image. Some third-party restore utilities have to support a particular set of hardware in order to work, and there are rare cases where that doesn't overlap with what Windows supports. On top of that, since it uses the built-in installer, it also gives you the opportunity to restore to new drives more easily. Our older method used the built-in restore utility of Windows 7, which worked, but had some odd limitations regarding which drive you could restore to and how large it had to be. This utility doesn't have those limitations.
So let's get started. First off, you'll want to insert your USB Tools drive into one of the USB ports on the computer. I recommend using a USB3 port, but a USB2 port will work as well. Once you've done that, go ahead and start up or restart the computer. When you get the initial POST beep on startup, start tapping the F8 key on your keyboard to get the Asus boot menu. Note, it might be different if you're using a laptop or other motherboard. Our laptops typically use F7. I typically will tap it about once every second or so. Eventually, you'll get something that looks like this screen.
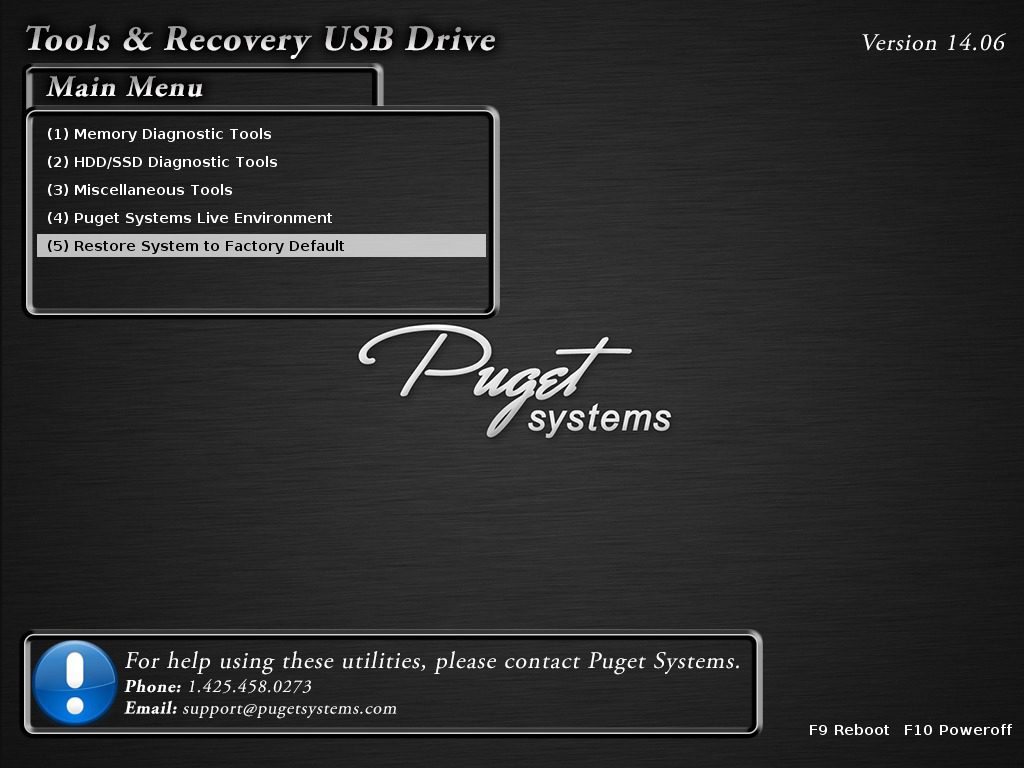
As shown in the screenshot, you'll want to highlight the KingstonDataTraveler 3.0 listing. Do that, then press enter. You'll be given the Main Menu of the Tools & Recovery USB Drive.
Select the option to Restore System to Factory Defaults and press enter.
You'll get this menu! Stay on "Continue Restoring System to Factory Default" and press enter again.
At this point, you'll see the Windows Setup dialog come up. Choose your localization info and click "Next".
You'll get this window. Click "Install now".
At this point, click "Skip". Since we're using an image, the key is already integrated into the install. There's no need to type it here.
This screen will require you to click the checkbox to accept Microsoft's license terms. Then click "Next".
At this screen, you'll want to click "Custom: Install Windows only (advanced).
This screen is where things get interesting. In the example above, you can see that there are two partitions showing on Drive 0. We'll want to delete both of them. You can do that by selecting a partition, clicking Delete, and then accepting the prompt that comes up (shown in the image below). You'll need to do that for both partitions.
Here's where things can get tricky, though. If you have any other drive partitions, you'll want to make sure you don't delete them. Deleting a partition removes all files and programs on that partition. Do not delete a partition unless you're sure what it is. In most configurations, the System and Primary partitions on Drive 0 will be your Windows install partitions. You'll lose any data on them when you do this, but any other partitions will be fine. However, there are rare configurations where those two partitions are on another drive. If you're not sure, give us a call and we'll help you figure that out.
This is the window that comes up when you do the steps listed above.
And this is the result once you've deleted the partitions. Note that if you've got other drives, they'll show up in the list as well, but this system only had the primary drive. Select the Unallocated Space and click "Next"!
And this is the result. You'll get the Installing Windows dialog. Let it do its thing. In less than half an hour or so, you'll have a clean install of Windows with all of the drivers and updates that came with your computer!
Need help with your Puget Systems PC?
If something is wrong with your Puget Systems PC. We are readily accessible, and our support team comes from a wide range of technological backgrounds to better assist you!
Looking for more support guides?
If you are looking for a solution to a problem you are having with your PC, we also have a number of other support guides that may be able to assist you with other issues.
