Table of Contents
Hello, Windows 11 user,
We know that when it comes to technology, sometimes things happen and you wish you could go back in time – and that’s exactly what System Restore is for. Here’s your guide to turning it on and using System Restore in Windows 11.
System Restore is that parachute that helps you bounce back from those shocking system instabilities that always seem to occur just after an operating system update, a driver installation, or other change that you know was perfectly legitimate. The beauty of it is that you can use System Restore to restore your system files and settings to a previous point in time, potentially fixing whatever is ailing your machine, without worrying about losing any of your personal files.
We’re going to walk you through enabling and using Microsoft System Restore to keep your system running smoothly.
Why System Restore is Useful
System Restore is a vital feature of your Windows 11 computer, especially when your computer starts malfunctioning for unknown reasons. Here’s why.
- It allows you to protect your computer against unexpected crashes and system restore failures.
- It helps enhance your computer performance.
- It helps you save install time and minimise system corruption.
- It helps you recover from crashes due to incompatibilities.
- Roll Back System Changes: If a software program, driver, or Windows update messes up or causes errors and it’s not easy to correct the problem, System Restore lets you back up to a point in time when everything was working properly.
- No Personal Data Loss: Unlike a hard reset of a device or a full system restore, System Restore does not change your personal files, documents or applications. It changes only system files and settings. System Restore ensures Workflow Continuity. When your system crashes for any reason, you can immediately restore to the previous state to avoid a disruption in workflow, without losing work or having to reinstall software.
Now, let’s learn how to enable and use System Restore in Windows 11.
Enabling System Restore
To make sure System Restore is available, first enable it:
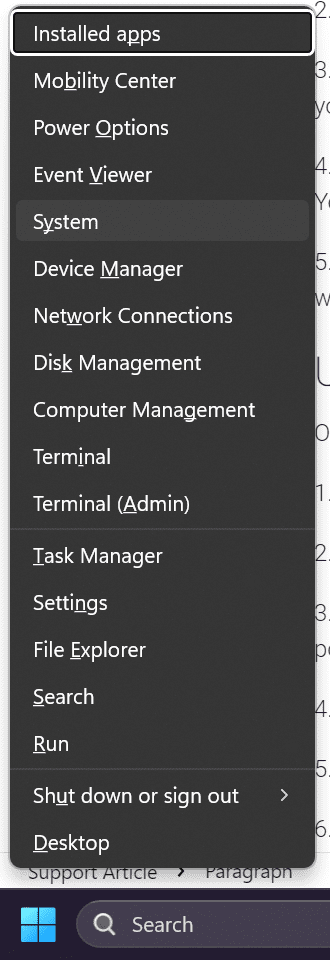
- Get to System Properties: Press
Win + X. From the menu that opens, click on ‘System’, or right-click on ‘This PC’ in the file explorer and select ‘Properties’.
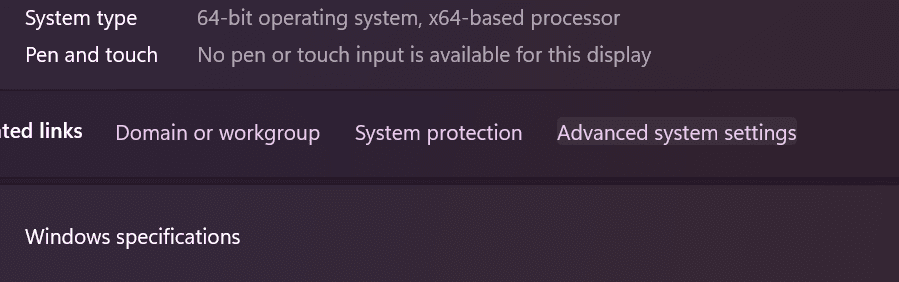
- Access System Protection: In the System window, click on the “Advanced system settings” link on the left sidebar or below “Device Specifications”
- Enable System Protection: In the System Properties window, navigate to the “System Protection” tab. Here, you’ll see a list of drives on your computer. Select the drive where you want to enable System Restore (usually the system drive, typically labeled “C:”).
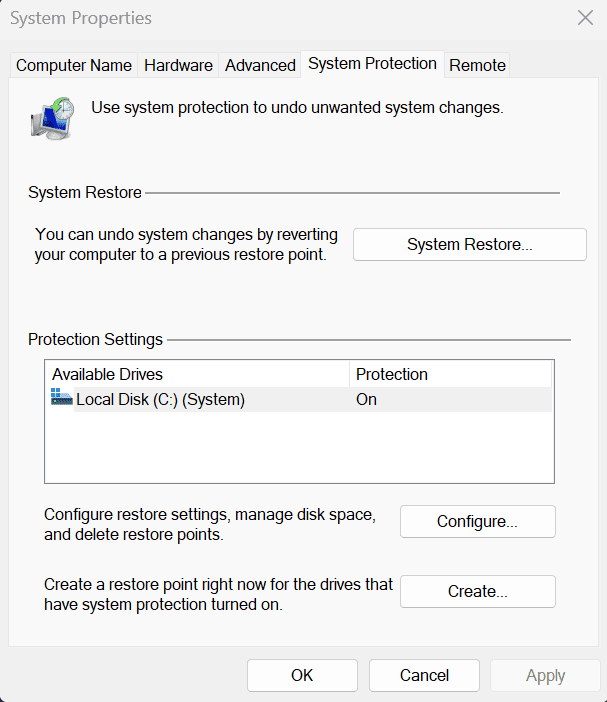
- Configure System Restore: Click the “Configure” button. In the next window, select “Turn on system protection” if it’s not already enabled. You can also adjust the maximum disk space allocated for restore points using the slider.
- Create a Restore Point (Optional): You can manually create a restore point by clicking the “Create” button in the System Properties window. This is a good practice before making significant changes to your system.
Using System Restore
Once you have System Restore turned on, you can use it to roll back your system to a previous restore point. Here’s how.
- System Properties: Open System Properties as you did the previous time.
- Access System Restore: In the System Properties window, click the “System Restore” button.
- Choose a Restore Point: The System Restore wizard will open. Click Next to see a list of available restore points. Pick the restore point from a time when your system was running smoothly, and click Next.
- Confirm your selection: This is your last chance to review the details of the restore point you selected. Make sure it’s the correct one, and then click Finish.
- Restore: Confirm the action: click ‘Yes’. Your computer will restart and the restoration will begin.
- Let It Run: You’ll need to restart your computer again. Let Windows restore and don’t interrupt it.
- Verification: Windows will confirm if the restoration was successful. Your system should now be as it was when the selected restore point was created.
Conclusion
Microsoft System Restore is a powerful tool that can save you from the headaches of system errors and interruptions to your workflow. By enabling and using System Restore in Windows 11, you can quickly and easily revert your computer to a previous, stable state without losing your important files or applications. It’s a valuable feature for troubleshooting and maintaining the health of your Windows 11 system.
Need help with a Puget System?
All Puget Systems computers come with lifetime technical support. Our support team is readily accessible and comes from a wide range of technological backgrounds to better assist you!

Looking for self-guided help?
Regardless of whether your computer was built by Puget Systems or not, if you are experiencing a problem with your workstation or server we have a large library of public support articles that you may find helpful.