Introduction
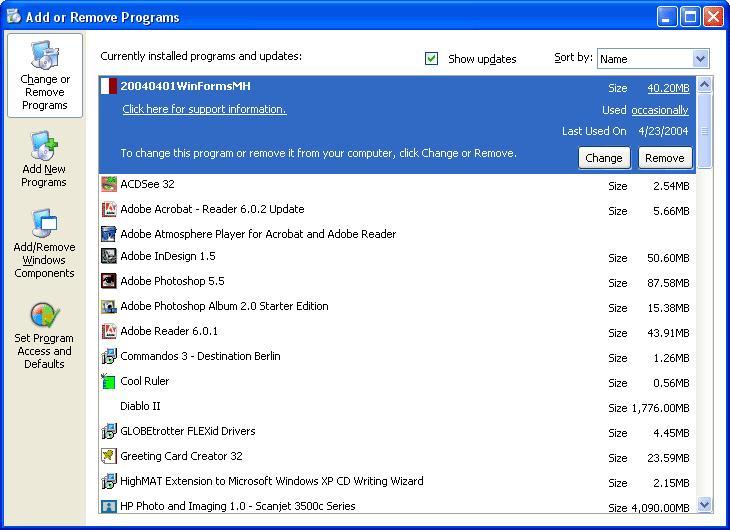
Adding software is usually done with the installation disk or executable, while adding Windows components can be done within the “Add and Remove Programs” utility. In order to change or remove a program in Windows XP, you must either use the “uninstall” utility bundled with the program you wish to remove, or more often, use the “Add and Remove Programs” option in the Windows XP control panel. DO NOT delete folders under your C: drive in an attempt to remove an unwanted program-this can cause serious problems with your operating system, often leading to full operating system reinstalls.
How to Remove Programs
- Click on the “Start” button, located in the lower left corner of your screen.
- Click on “Control Panel” to access control panel options.
- The system may warn you that changing these options may negatively affect your system. Ignore this warning and proceed.
- Open the “Add and Remove Programs” utility. After a moment or two (it may take a second), you’ll be provided with a list of programs.
- Locate the program you wish to remove. You can sort the results by clicking on “sort by”.
- At this point, you can either change the program or remove it. To change the program, click Change/Remove or Change. To entirely remove it, click Change/Remove or Remove.
- It is possible that you’ll receive no further notification of the action from Windows, or it may start a third-party program to assist with removal developed by the software manufacturer.
How to Add/Remove Windows Components
In order to add or remove Windows components, you must be an administrator on your computer.
- Click on the “Start” button, located in the lower left corner of your screen.
- Click on “Control Panel” to access control panel options.
- The system may warn you that changing these options may negatively affect your system. Ignore this warning and proceed.
- Open the “Add and Remove Programs” utility. After a moment or two (it may take a second), you’ll be provided with a list of programs.
- Click Add/Remove Windows Components.
- Follow the instructions in the Windows Component Wizard.
If you experience technical difficulty during or after this process, please contact our technical support department for assistance.
Puget Systems
Technical Support Department
425.458.0273 x2
[email protected]
