Always look at the date when you read an article. Some of the content in this article is most likely out of date, as it was written on
March 11, 2008. For newer information, see
our more recent articles.
Introduction
This guide explains the process for installing Windows Vista on a new or freshly formatted hard drive. This does not cover hard drives configured in a RAID setup.
Disclaimer: This guide was intended to provide an accurate and well-established procedure for installing Windows Vista. This process erases your hard drive! Puget Systems cannot be held liable for any consequential damage or loss of data or hardware.
Minimum System Requirements
Home Premium, Business, Ultimate
Processor: 1GHz (32 or 64 bit)
System Memory (RAM): 1GB
Hard Drive: 40GB with 15GB available for Vista
Video Card: 128MB Memory, DirectX 9 Support
DVD-ROM Drive
Installing Windows
Insert your Windows Vista DVD and restart your computer. Your computer must be configured to boot from the DVD drive first. You may need to configure your computer’s BIOS to boot priority to boot from the CD or DVD drive first. Please refer to your motherboard’s User Manual for instructions on how to do this.

If you are using an Asus motherboard, you can also continually tap F8 during startup until the machine gives you the ‘BBS’ or ‘Boot Device Selection Menu’. In this menu, select the drive which has the DVD in it and press enter.
| You may see a “Press any key to boot from CD…” message on your screen. This message will only be present for a few seconds. Press a key. Once your computer boots to the DVD, the setup process will begin. |
 |
| Select your language, Time and Currency format, and Keyboard or Input method, and hit “Next” |
 |
| Click “Install Now” |
 |
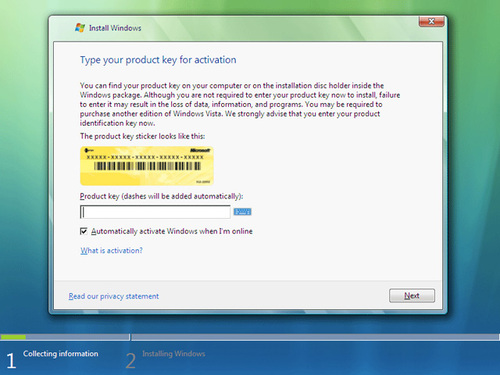
| Type your product key that came with your copy of Vista. (Note: Your Product key is located on a label on the back or bottom of your computer. It is also available on your Puget Systems Invoice.) |
 |
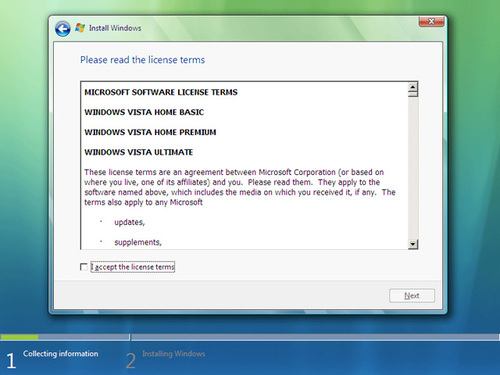
| You must accept the terms of the End User License Agreement (EULA) before you can install Windows Vista. |
 |
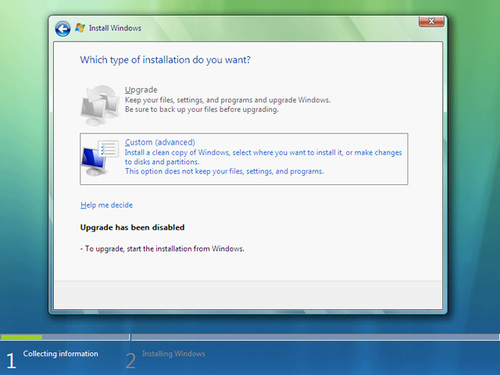
| Choose whether you are upgrading from a previous Windows installation to Windows Vista. If you are installing a fresh installation of Windows Vista, select the Custom option. |
 |
Setup will copy files to your hard drive. After the files are copied to your hard drive, setup will begin to install Windows Vista.
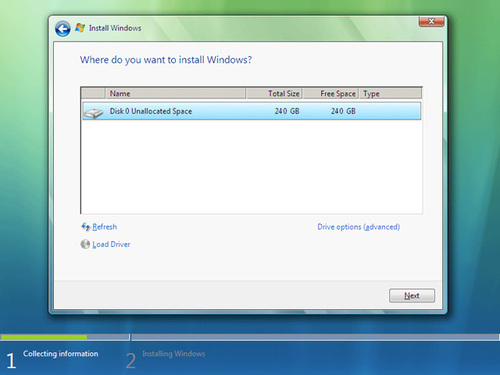
| Select the drive on which you would like to install Vista. You can delete, format, create, and extend partitions or hard drives by clicking Drive options (advanced). |
 |
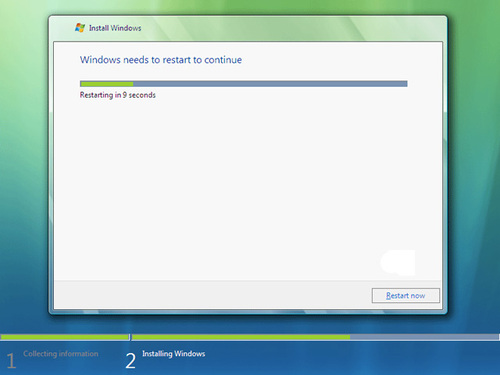
| Setup will automatically restart your computer at various stages of the installation process. You may see a “Press any key to boot from CD…” message — do NOT press any key. The computer will automatically continue the installation process. |
 |
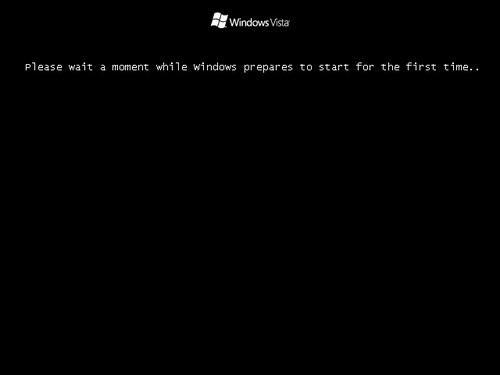
| Setup has finished installing key components of the Vista operating system, and is now preparing to load Windows Vista for the first time to start the next phase of the installation process. |
 |
| Setup is finished installing Windows Vista and the main components necessary to run your computer. |
 |
Setup will next guide you through creating user accounts and personalizing your installation of Windows Vista
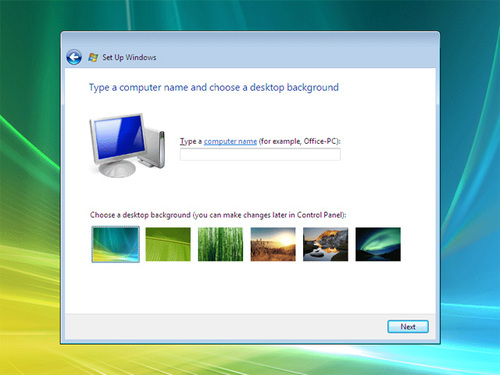
| Type a name for your computer and select a desktop background. |
 |
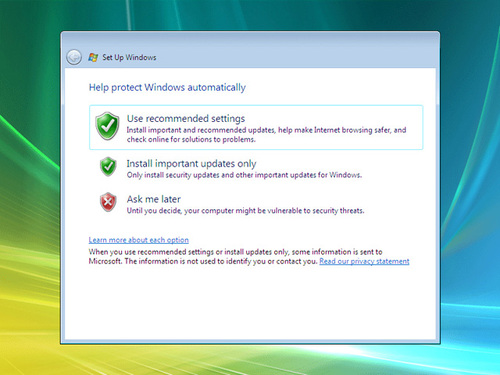
| You will be presented with some basic configuration options. Select how you’d like to handle Windows Updates. |
 |
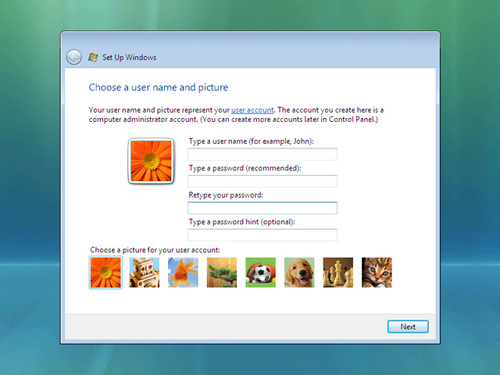
| Create the Administrator Account on this computer by assigning a user name and a password. Other accounts can be added later on from the Control Panel. |
 |
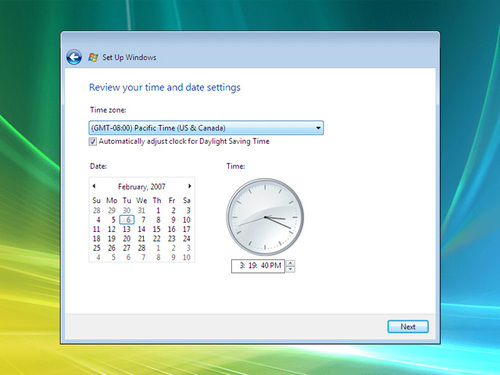
| Set your Date and Time. |
 |
Installation Complete
Congratulations! Windows Vista is now installed on your computer. However, we are not done yet. You may still need to install drivers for your motherboard devices, your graphics and sound cards, and any other hardware installed in or connected to your computer.
Installing Hardware Drivers
Now that Vista is installed, the next step is to install your hardware drivers. Installing drivers for your hardware will insure that you have access to all of your computer’s resources and increase the stability of your computer.
Motherboard Resources
Your motherboard came with a CD containing drivers for components on your motherboard such as chipsets, USB, Ethernet, and onboard devices such as audio or video. These drivers should be installed first. Use the CD to install these drivers. Later if you wish, you can update these drivers from the vendor website.
Graphics and Sound (If not built into the motherboard)
Install the drivers and software for your graphics and sound cards either from the accompanying software or by downloading the latest drivers from the vendor websites.
Other Devices
Printers, scanners, multimedia keyboards and other such devices can now be installed. Please refer to the component’s user’s guide for installation assistance.
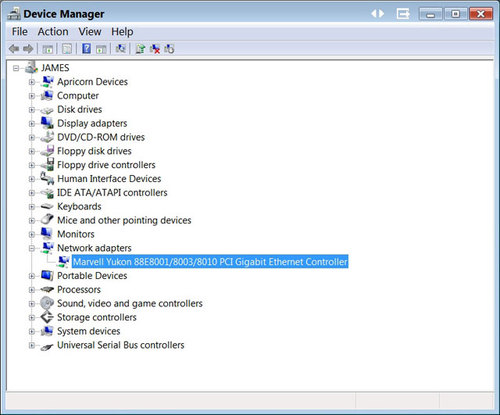
| The Device Manager provides the best and easiest method of verifying and updating drivers. To access the Device Manager, click on the Start button, then right-click on Computer and select Properties. |
 |
| Select the Device Manager in the left-side column of the System Properties screen. |
 |
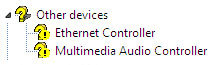
Look for anything in the Device list showing a question mark. This indicates that a driver has not been installed.
| Double-clicking on the device will bring up the properties for that device and provide an opportunity to install the required drivers. |
 |
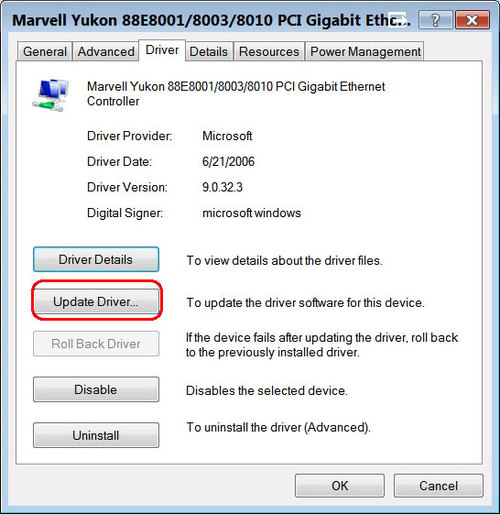
| The Device Properties windows provides many options for installing and configuring a device. In this instance, we need to install a driver. Click on the Driver tab, and select Update Driver. You can either have the Hardware Wizard install a driver automatically, which will search your CD drives and Microsoft’s servers for a driver, or you can install a driver from a specific location, such as a file on a CD or a downloaded driver. |
 |
Windows Updates
After your drivers are installed and you have access to the Internet, you will need to install any Windows Vista updates from Microsoft’s website at windowsupdate.microsoft.com.
If you experience technical difficulty installing Windows Vista on your Puget Systems PC, please contact our technical support department for assistance:
Puget Systems
Technical Support Department
[email protected]
Toll Free: 1-888-PUGET-PC ext. 2 [E]