Table of Contents
Welcome to an enlightening journey into the exploration of Windows 11’s user interface with a particular focus on its highly sought-after feature – the dark mode. This walk-through aims to empower you with a firm comprehension of the brand-new operating system’s layout, detailing essential settings and personalization options. We particularly dwell on the novel dark mode feature, providing step-by-step guidance on how to activate and customize it to your visual standards. Beyond the activation and personalization process, we’ll also immerse into addressing and troubleshooting common challenges you may encounter while transitioning into this dark theme across various applications.
Understanding Windows 11 Interface
Great news – the Windows 11 Interface is finally gorgeous! If you’re like us, you love exploring new software nuances, and Windows 11 is filled with some seriously groundbreaking features. We’re talking about enhanced productivity, an intuitive design, and an entirely new look.
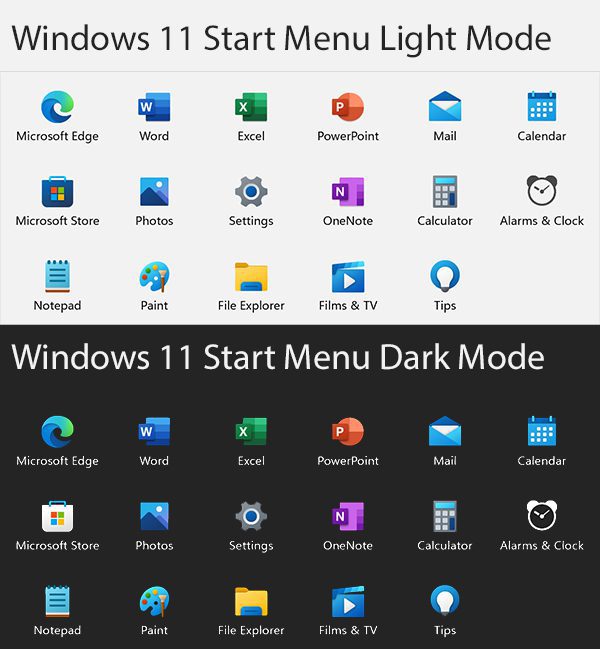
First and foremost is the centered Start Menu. Remember Windows 10? It had the Start Menu pinned to the left, but Windows 11 introduces a sleek, centered design that provides quick access to your apps, files, and settings, thus boosting your productivity. The rounded corners on the windows and menus foster a more modern aesthetic. The features aren’t just about beauty; they’re about functionality. In this article we will cover my favorite, Dark Mode. It’s time to dive on in and make the most of these dynamic features. Happy exploring!
Activating Dark Mode
Windows 11 has truly changed the game with its refreshing user interface, new features, and enhanced usability. One such feature that has gained attention is its Dark Mode. This mode changes the color scheme of your Windows 11 system to darker hues, reducing strain on your eyes, especially in low-light environments. This article aims to teach you how to activate the dark mode feature in Windows 11 in a few simple steps.
Step 1: Open ‘Settings’
Click on the Start button to strike off the process. In the Start Menu, you’ll see several application icons. Find the one named ‘Settings’ and click on it.
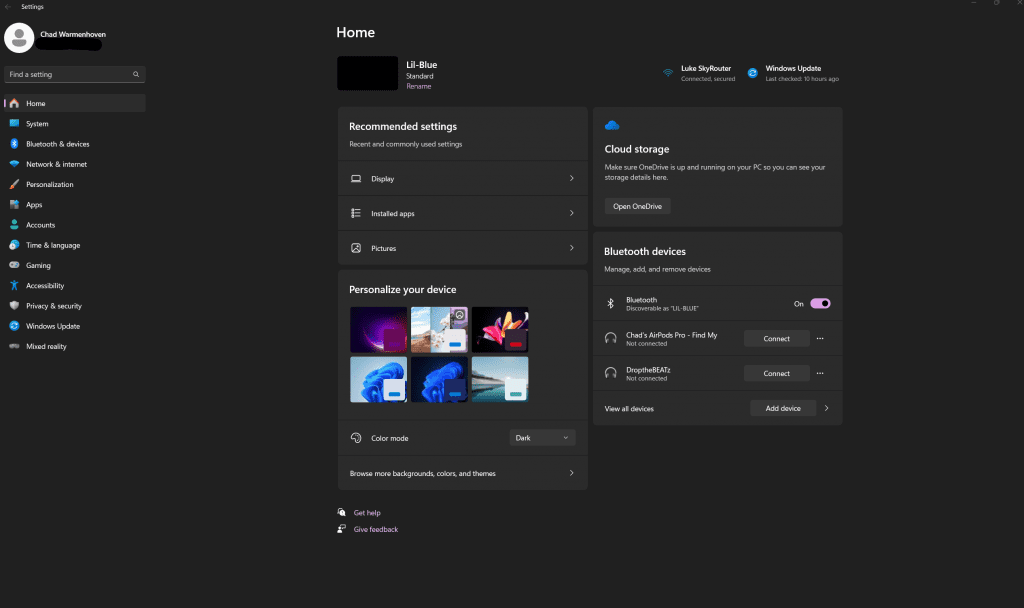
Step 2: Navigate to ‘Personalization’
Once you are in the Settings menu, scan for the ‘Personalization’ option situated in the left-hand column. As the name suggests, this section allows you to tweak various aspects of Windows to make it more to your liking.
Step 3: Select ‘Colors’
On clicking ‘Personalization,’ a multitude of options will appear on the right. Locate and select ‘Colors.’ This section houses the aesthetic setting that controls the visual components of your display.
Step 4: Choose ‘Dark Mode’
Under the ‘Choose your color’ drop-down menu, you’ll have a choice between ‘Light’, ‘Dark’, and ‘Custom.’ With Dark Mode as your goal, select ‘Dark’. This instantly changes your system’s theme to the darker color scheme.
Step 5: Apply Dark Mode to Apps
If you want the Dark Mode to apply to your apps as well as the Windows system, scroll down to ‘Choose your default Windows mode’ and ‘Choose your default app mode.’ Select ‘Dark’ for both to extend the dark theme across all areas of your Windows environment.
And there you have it! Dark Mode is now activated on your Windows 11 system. Enjoy working, browsing, or gaming without straining your eyes. This feature adds an aesthetic element to your PC while also being considerate of your eye comfort, making it a game-changer during those late-night work or leisure sessions. Try it out, play around, and if you decide that you prefer the light mode, simply follow the same steps and choose ‘Light’ instead of ‘Dark.’
The inclusion of Dark Mode is a testament to the thought that Microsoft has put into enhancing the user experience with the new Windows 11. The tech world is expecting even more exciting updates in the future. So stay tuned, and don’t forget to take full advantage of these golden nuggets of functionality.
Switching to Dark Mode on Windows 11: Common Problems and Their Solutions
As you transition into the world of Windows 11, encountering a few hiccups is understandable; even while performing the straightforward task of switching to Dark Mode. This component of our guide aims to help you understand some common issues that can arise when toggling to Dark Mode, and how to navigate them.
Issue 1: Dark Mode Not Applying on Certain Apps:
First on our list is a commonly witnessed situation where Dark Mode fails to apply on some specific exclusive Windows apps, even after successful application in Settings. This mismatch can occur due to custom settings within those apps.
Fix: Open the specific app’s settings and search for Display Options. Generally, most apps offer an appearance section where you can manually configure the theme settings to Dark Mode.
Issue 2: Difficulty Viewing In Dark Mode:
Dark Mode doesn’t always agree with every set of eyes. For some users, text might appear faint or the overall contrast might affect readability.
Fix: No need to abandon Dark Mode entirely. Try adjusting the ClearType settings. Simply search ‘ClearType’ in the Start menu and follow the prompt or adjust the contrast settings to optimize Dark Mode to your preference.
Issue 3: Inconsistent Dark Mode Across Connected Monitors:
When using a multi-monitor setup, you might observe an inconsistency with Dark Mode’s application. This issue could arise from different color profiles or monitor settings.
Fix: Check each monitor’s settings individually. Assure the color profiles and monitor settings align with Dark Mode.
Issue 4: Icon Colors Appearing Dull in Dark Mode:
In Dark Mode, the vibrancy of your icon colors may seem subpar, making them less distinguishable.
Fix: This can be rectified by navigating to Settings > Personalization > Colors and switching the ‘Accent Color’ to a brighter hue. Also, checking the box that reads ‘Automatically pick an accent color from my background’ could provide a dynamic color solution compensating for Dark Mode.
Issue 5: Windows Search Bar Not Switching to Dark Mode:
A minor yet often noticed issue is where the Windows Search bar remains in Light Mode, contrasting its Dark Mode surroundings.
Fix: A simple system restart generally fixes this anomaly, ensuring the Search Bar syncs with the overall Dark Mode settings.
While transitioning to the dark side (pun intended) with Windows 11 might seem a bit daunting initially, with a little know-how and tweaking, you can enjoy a smooth, eye-friendly user experience. Remember, every new technology comes with its quirks; the secret lies in mastering them! With that said, enjoy exploring every nook and cranny of your latest Windows 11 update. Stay tuned for more tips, tricks, and troubleshooting advice.
Conclusion
By now, you possess not only a thorough understanding of Windows 11’s interface, but also the mastery of the dark mode: how to enable it, customize it to your tastes, and troubleshoot common inconsistencies across applications. This knowledge allows you to effectively use Windows 11 to its maximum potential, while enjoying the aesthetics of a darker, less eye-straining theme. Ultimately, your newfound skills contribute to a more efficient, pleasant, and visually comfortable technology experience, signifying the importance of understanding and customizing your tools as you navigate this digital age.
Need help with a Puget System?
All Puget Systems computers come with lifetime technical support. Our support team is readily accessible and comes from a wide range of technological backgrounds to better assist you!

Looking for self-guided help?
Regardless of whether your computer was built by Puget Systems or not, if you are experiencing a problem with your workstation or server we have a large library of public support articles that you may find helpful.