Introduction
To readers of the Puget blog, my name is Saad Moosajee – a Director often working with 3D, Animation and VFX. As a Director and Artist working in film, the technical capabilities of hardware often have a huge impact on what sort of imagery I’m able to create. After years of building my own machines to try and overcome those limits, I’ve begun collaborating with the team at Puget Systems. In this article, I’ll share some of the hardware testing, experiences, and learnings I have when tackling the technical aspects of SideFX Houdini – one of my go-to applications. For readers who are interested in learning more about my projects, I’ve also done an interview with Puget Systems which will be published soon.
Why Houdini
The popularity of Houdini in production comes down to its feature-rich, scalable approach. In addition to being a fully procedural application, it offers workflows across all major parts of the CG pipeline, from modeling and look development to FX simulations and final rendering in its internal renderer Karma XPU (included at no cost with Houdini license subscription). Although Houdini’s reputation began as an application for high-end simulation and FX, in recent years its growing scalability has pushed studios and even individuals working alone to use it for all aspects of the CG creation pipeline. Below are two examples from my own projects. The first is a more traditional use case: a large-scale simulation shot created for a music video:

The second, perhaps less traditional, is a 360 panoramic simulation shot created for the Sphere in Las Vegas:

In Production
In production, I most frequently turn to Houdini for complex tasks and shots, longer-form projects that require scaling up, and simulation. In order to do that properly, I need to make sure my hardware can handle Houdini’s more intensive areas. The places I most frequently experience slow performance are simulation- and solver-based tools like Volumes (Pyro FX), FLIP (Fluid sim), Vellum (cloth/soft bodies), and Rendering (Redshift / Karma XPU). Let’s take a closer look into how Houdini is engaging the hardware of your machine in those areas, and how that knowledge can help to optimize possible workflows.
Simulation (Pyro FX / FLIP / Vellum)
In simulation-based workflows like Pyro, FLIP, or Vellum, a key factor for performance is whether you’re simulating locally (one simulation at a time) or distributed via an application like Deadline (simulation sliced and run in parallel). For larger-scale projects, including short films, music videos, concerts, I found distributed simulation on a high-core-count CPU like AMD’s Threadripper PRO was most efficient. On smaller projects like still frames, concept art and Instagram reels, a higher clock speed CPU was more important.
Other things to keep an eye on are simulation resolutions (voxels in Pyro and Flip, substeps in vellum) and caching. For instance, if you’re doing a lot of shots with ‘hero’ simulations that are close to the camera, you may need higher voxel resolutions / simulation sub-steps, which require more RAM. The more hero and detailed your simulation geometry becomes, the larger the cache size will also be. When this happens, a fast SSD will be critical to reduce I/O bottlenecks while writing or reloading simulation caches. A powerful GPU to support smoother viewport playback for iterative adjustments is also important.
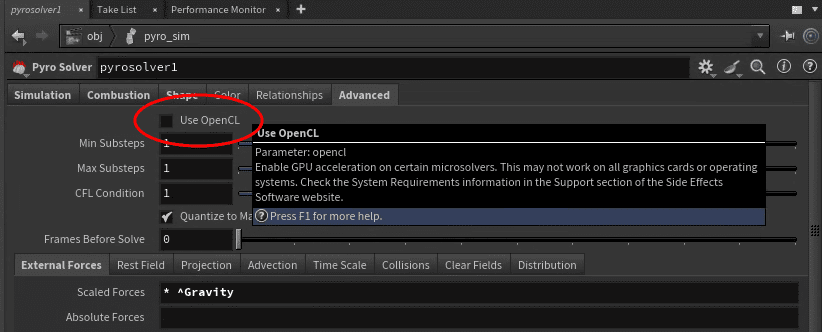
Lastly, Pyro FX simulation and Vellum both have the potential to be accelerated by the GPU. To benefit from this you’ll need a video card capable of running OpenCL that ideally has a large amount of VRAM; I recommend at least 24GB. This option also needs to be enabled within Houdini by checking this box in Preferences:
Rendering (Redshift / Karma XPU)
Like other applications, Houdini can work with many popular plugin renderers including Octane, Redshift, V-Ray, Arnold, etc – in addition to having its own built-in renderer, Karma XPU. I’m focusing on Redshift and Karma as I think these are the two practical choices average artists and small studios will be deciding between.
Redshift is primarily a GPU renderer, so the more GPUs you have the faster it’s going to run. Karma XPU is a hybrid renderer, meaning that its using both the GPU and CPU to render. Its worth noting that Redshift does have a hybrid rendering option where it can use the CPU, but I personally have not found this to be much faster than straight GPU rendering. Conversely, Karma XPU has the ability to disable CPU and render only with the GPU, which is actually sometimes faster than the XPU option.
Using the CPU for rendering in Karma or utilizing out-of-core memory options in Redshift can be beneficial when the scene being rendered needs more memory space than is available in VRAM. Most small studios won’t run into this situation, but massive scenes in feature films and other advanced projects may need more than the 24GB of memory on a video card like the NVIDIA GeForce RTX 4090, or even the 32GB on the new RTX 5090.
This can all get a bit technically obtuse, but bottom line I’d say that although Karma is native to Houdini, I feel Redshift and GPU rendering is still a better choice overall for most users. When thinking about what hardware to have for your Houdini machine, fast GPUs with a lot of VRAM, like the RTX 5090, are going to cover most artists and situations.
Where Karma XPU has a bit of a leg up, in my opinion, is scalability. By that I mean that if I was a small studio working on a short film with a lot of complex geometry, simulation, hair and fur, etc – I may want to look more at Karma. I think its XPU also offers good scalability with out-of-core situations, where the scene is so heavy it exceeds available video card memory.
Tests & Benchmarking
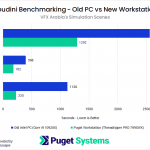
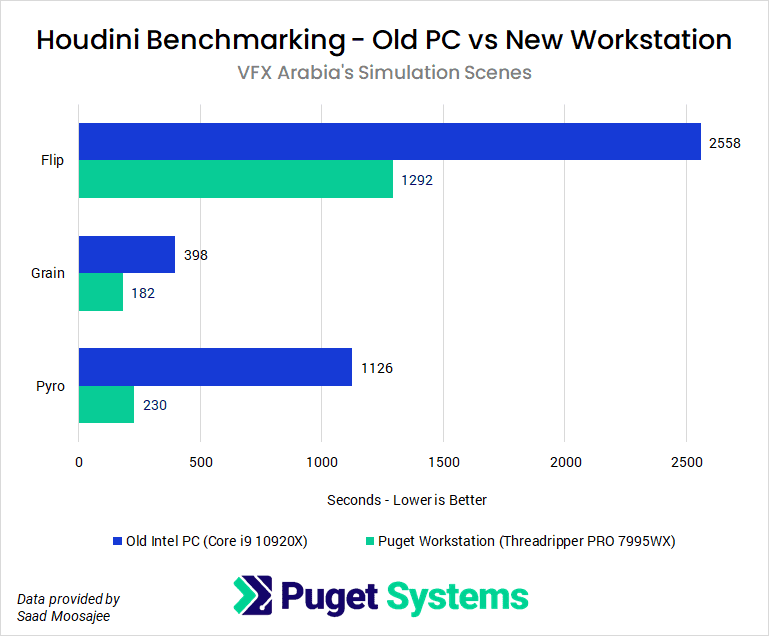
To put this into better context, I benchmarked my new Puget workstation (designed for studio production & look development) against my previous look development PC, utilizing VFX Arabia’s pre-defined Houdini simulation scenes.
Flip: Large-scale fluid simulation with 31 million points.
Grain: Sand simulation with 700,000 particles.
Pyro: Smoke and fire simulation at 10 million voxels.
The workstation Puget Systems provided to me unsurprisingly outperformed my old machine, cutting the time by around half on Flip and Grain simulations and calculating almost 4.5x faster on Pyro.
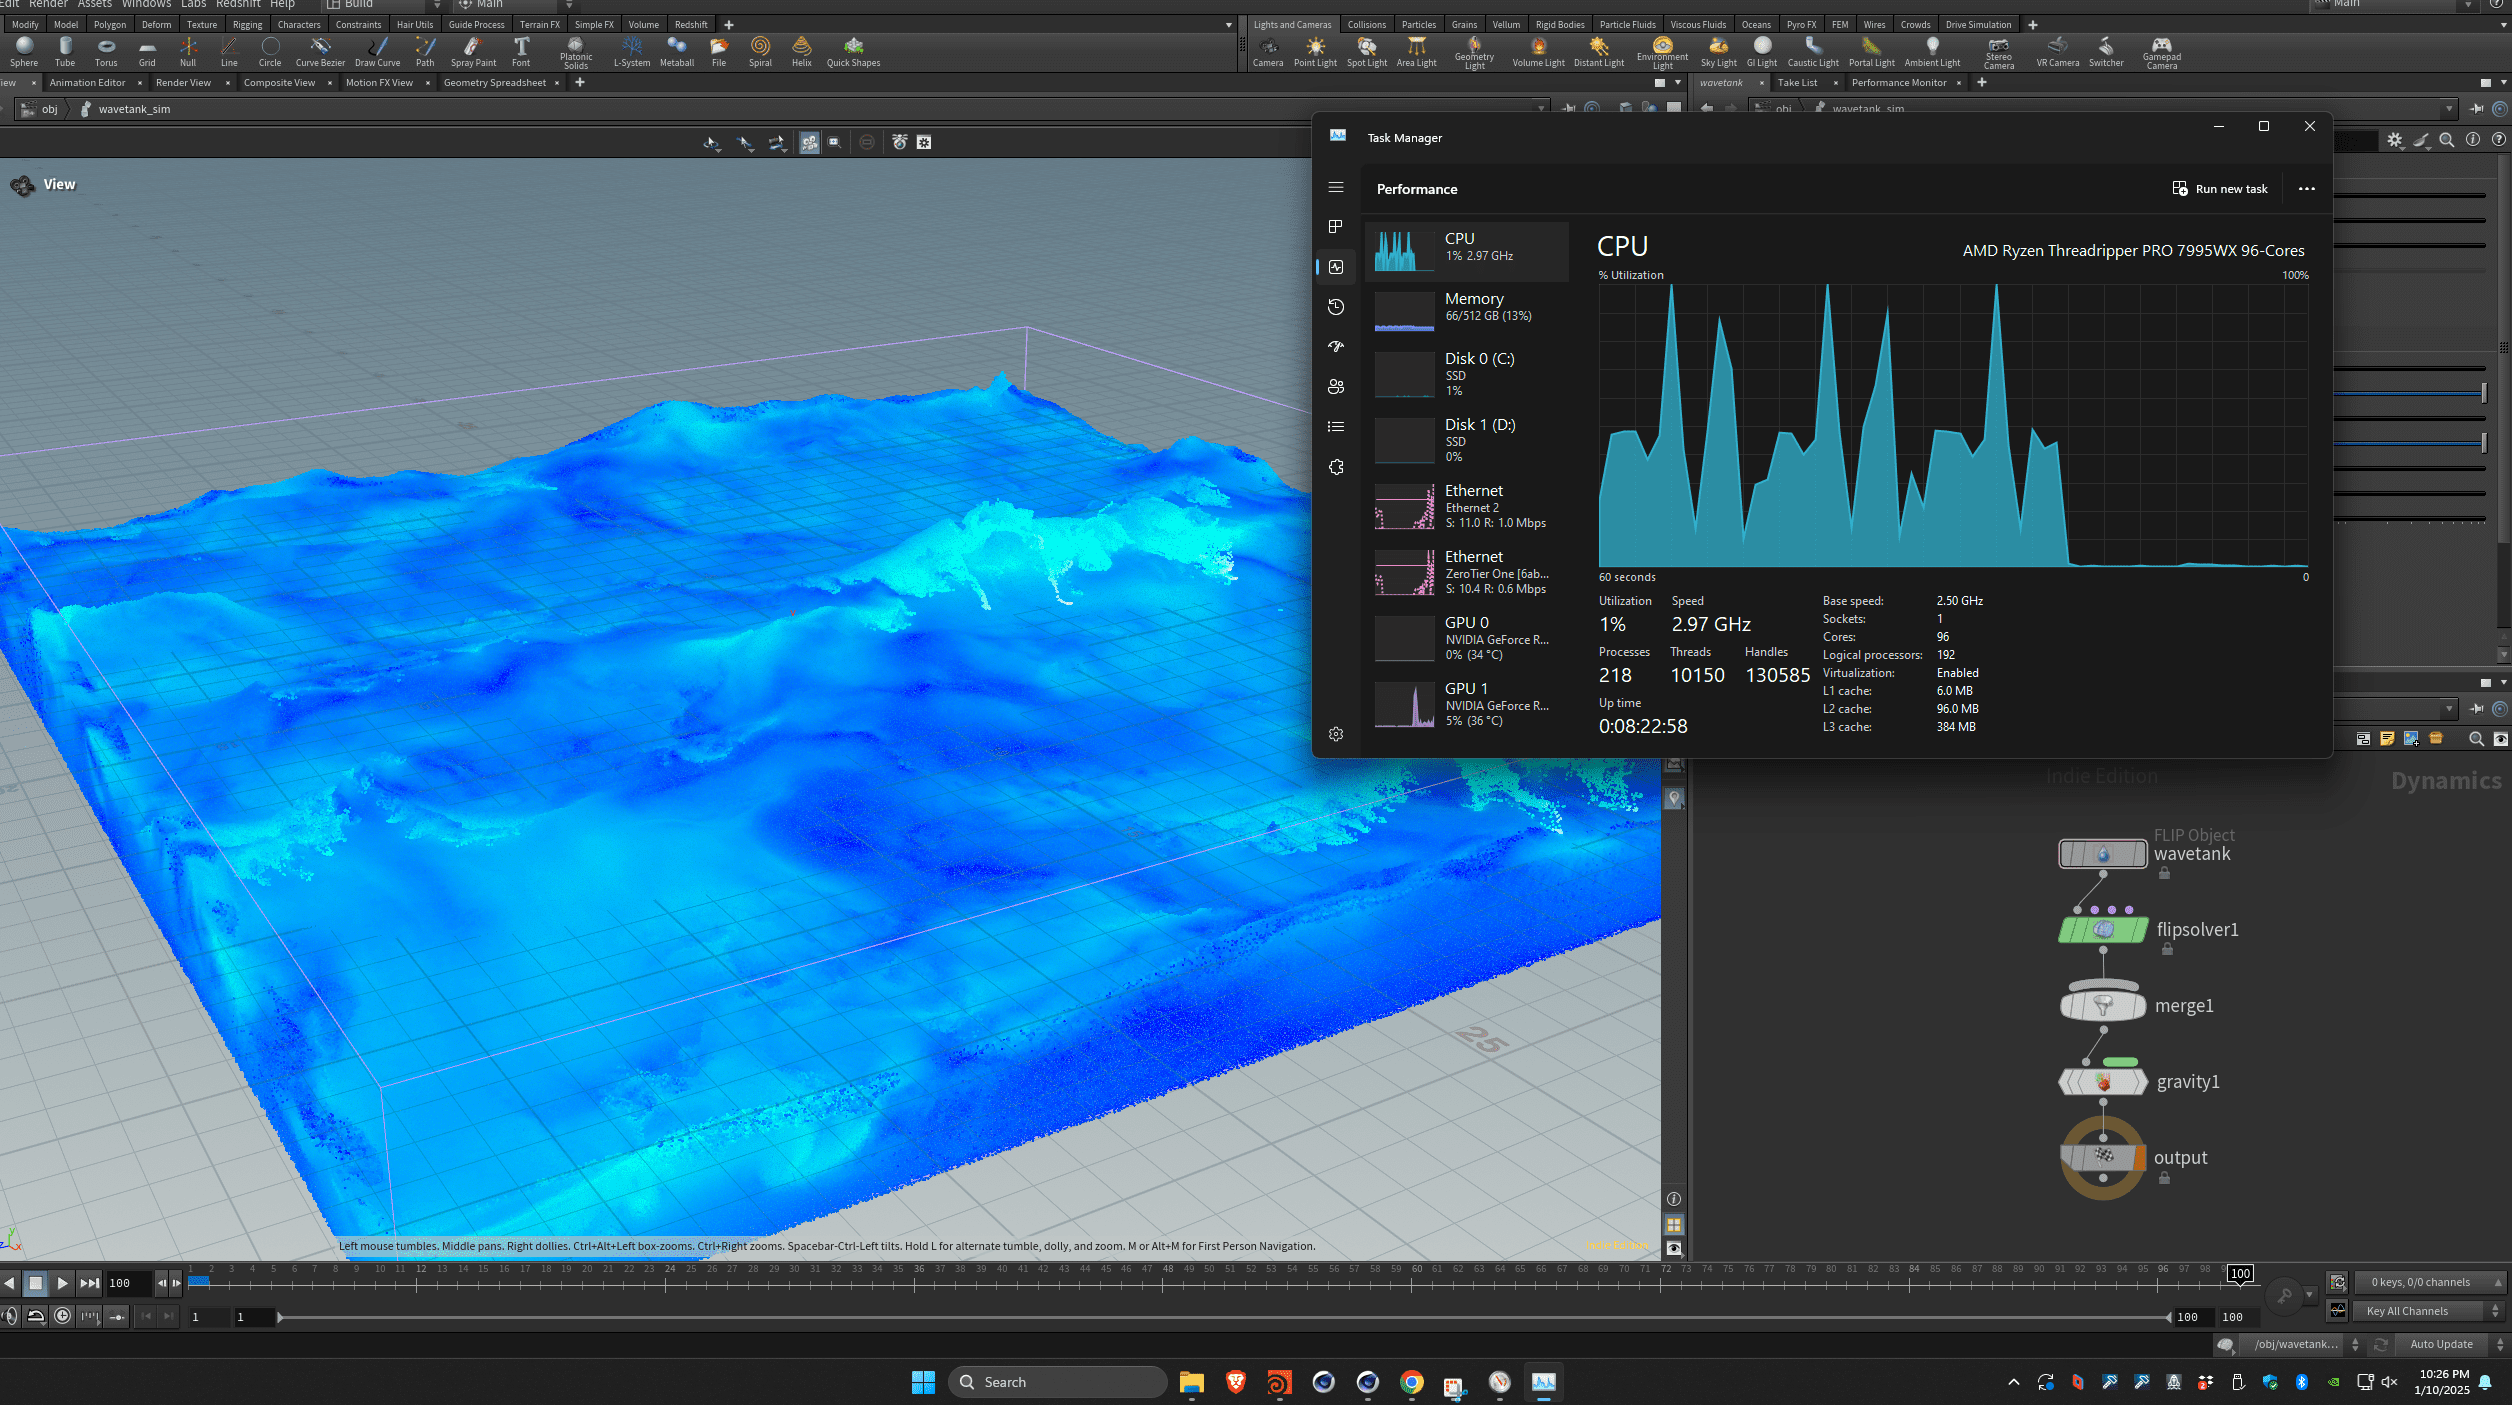
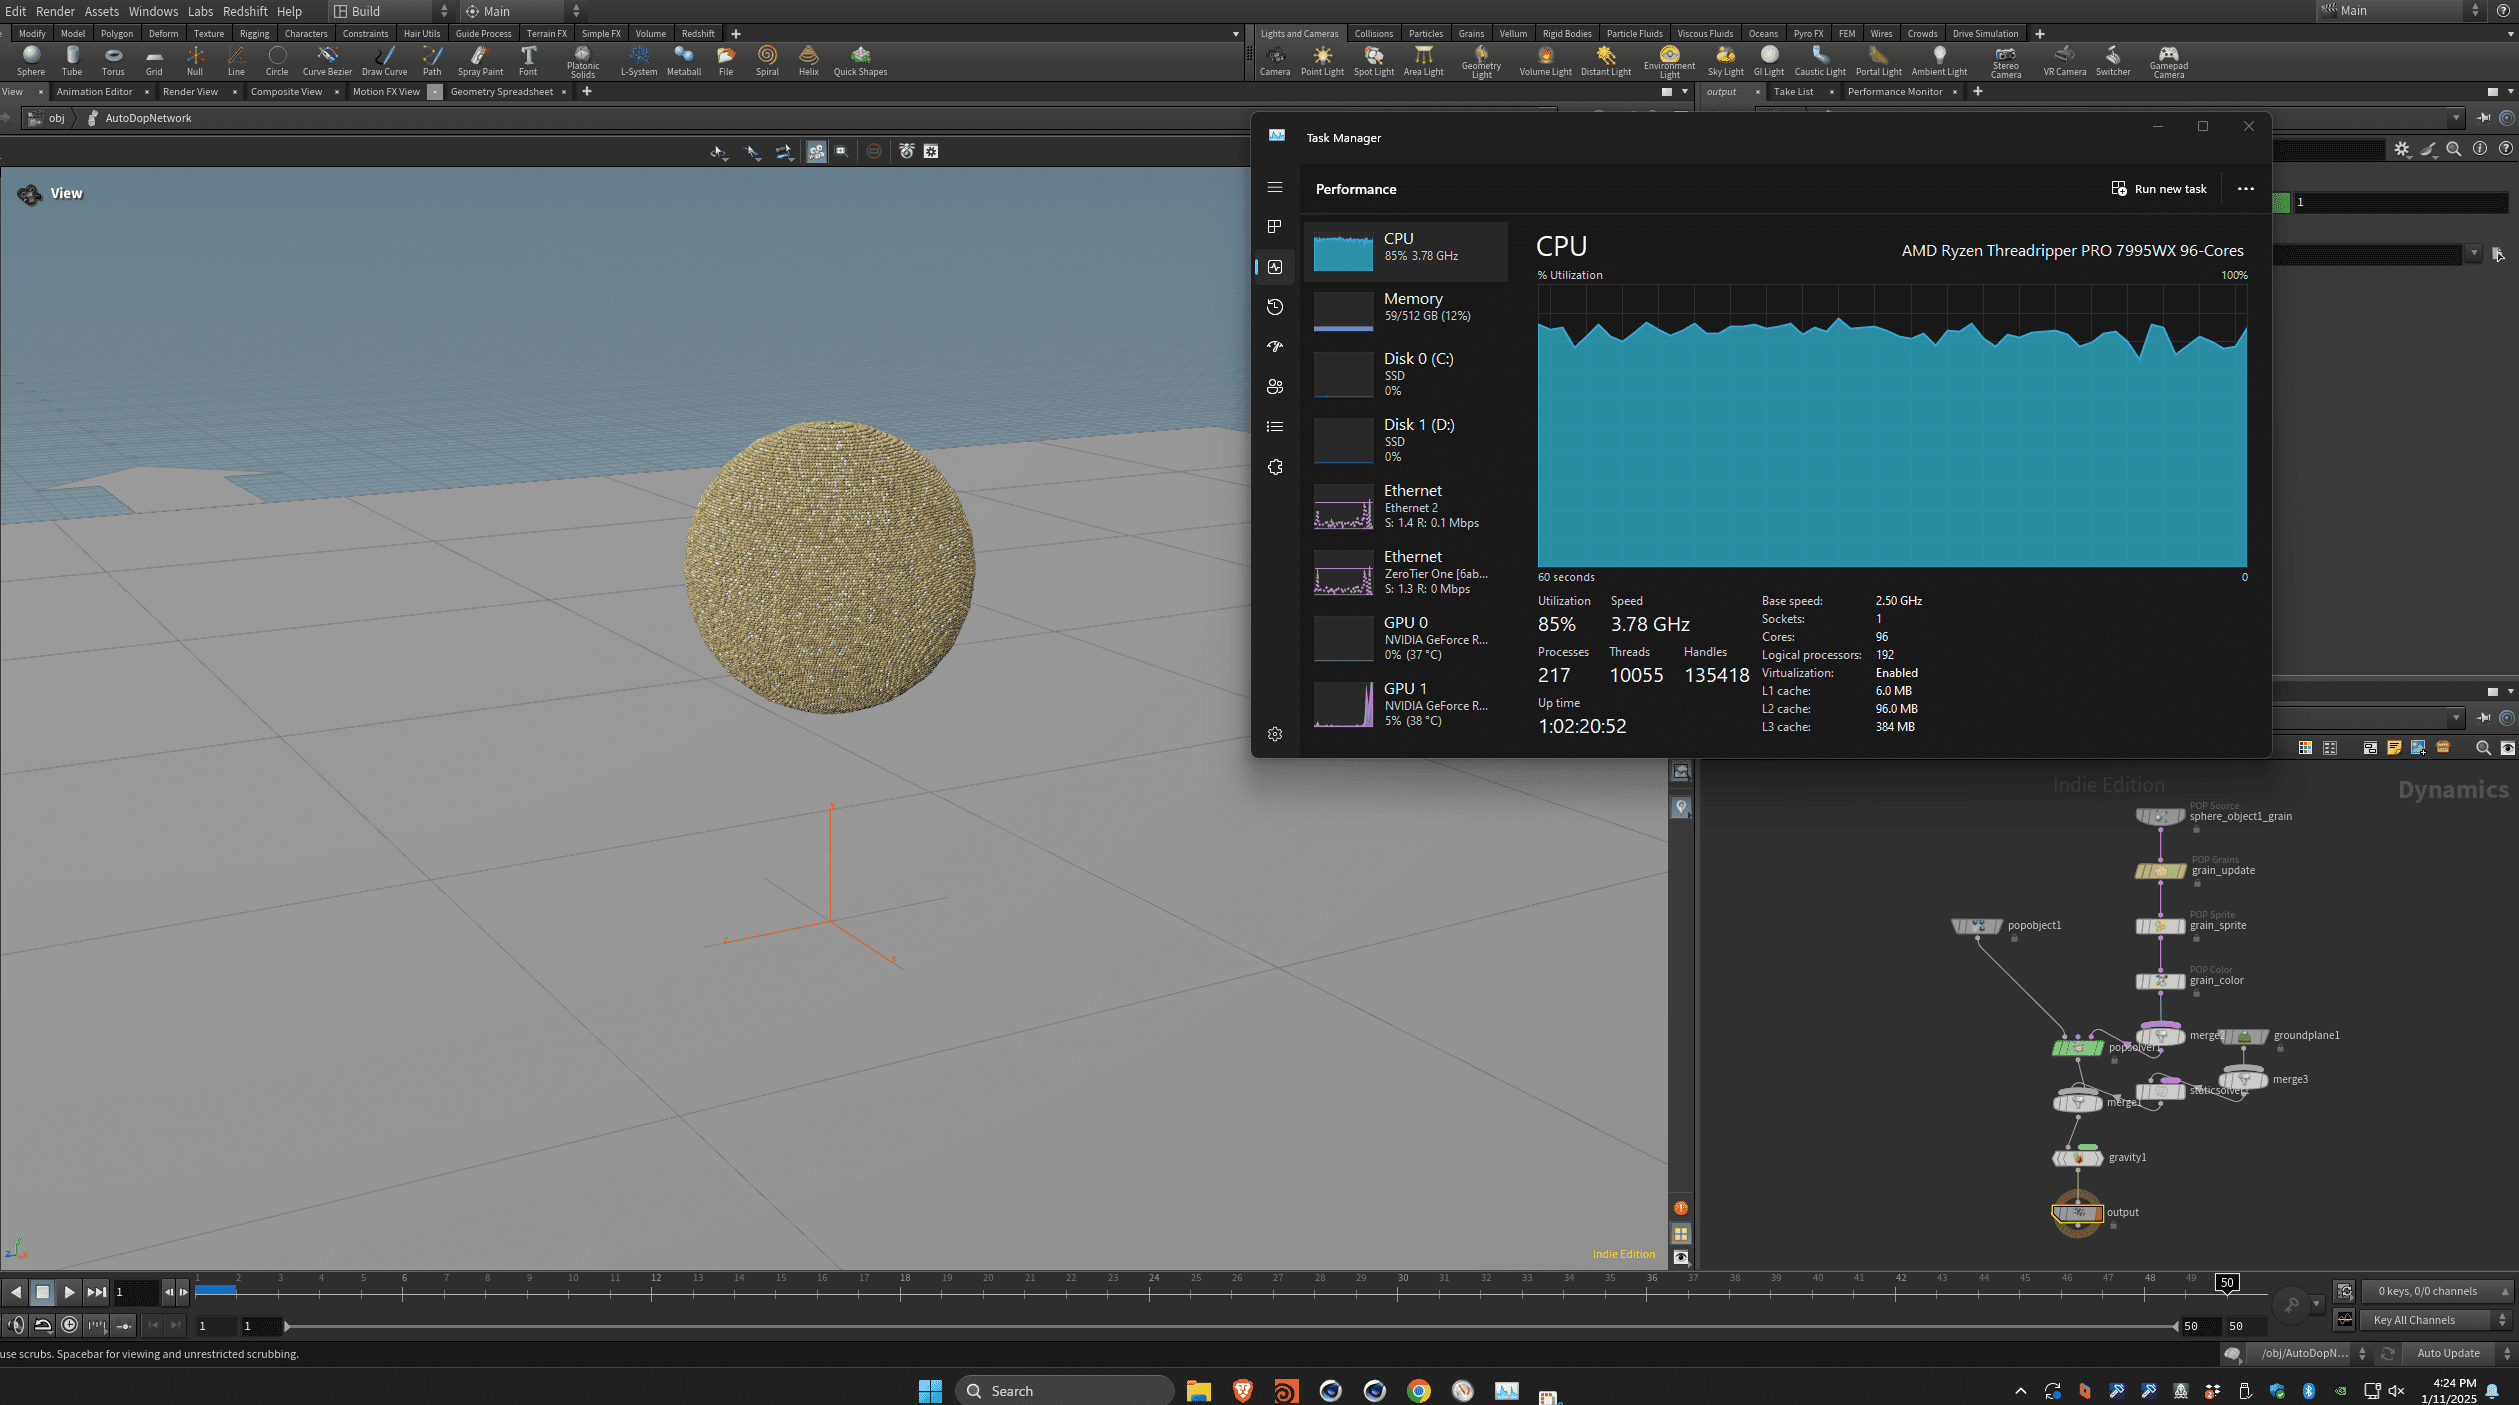
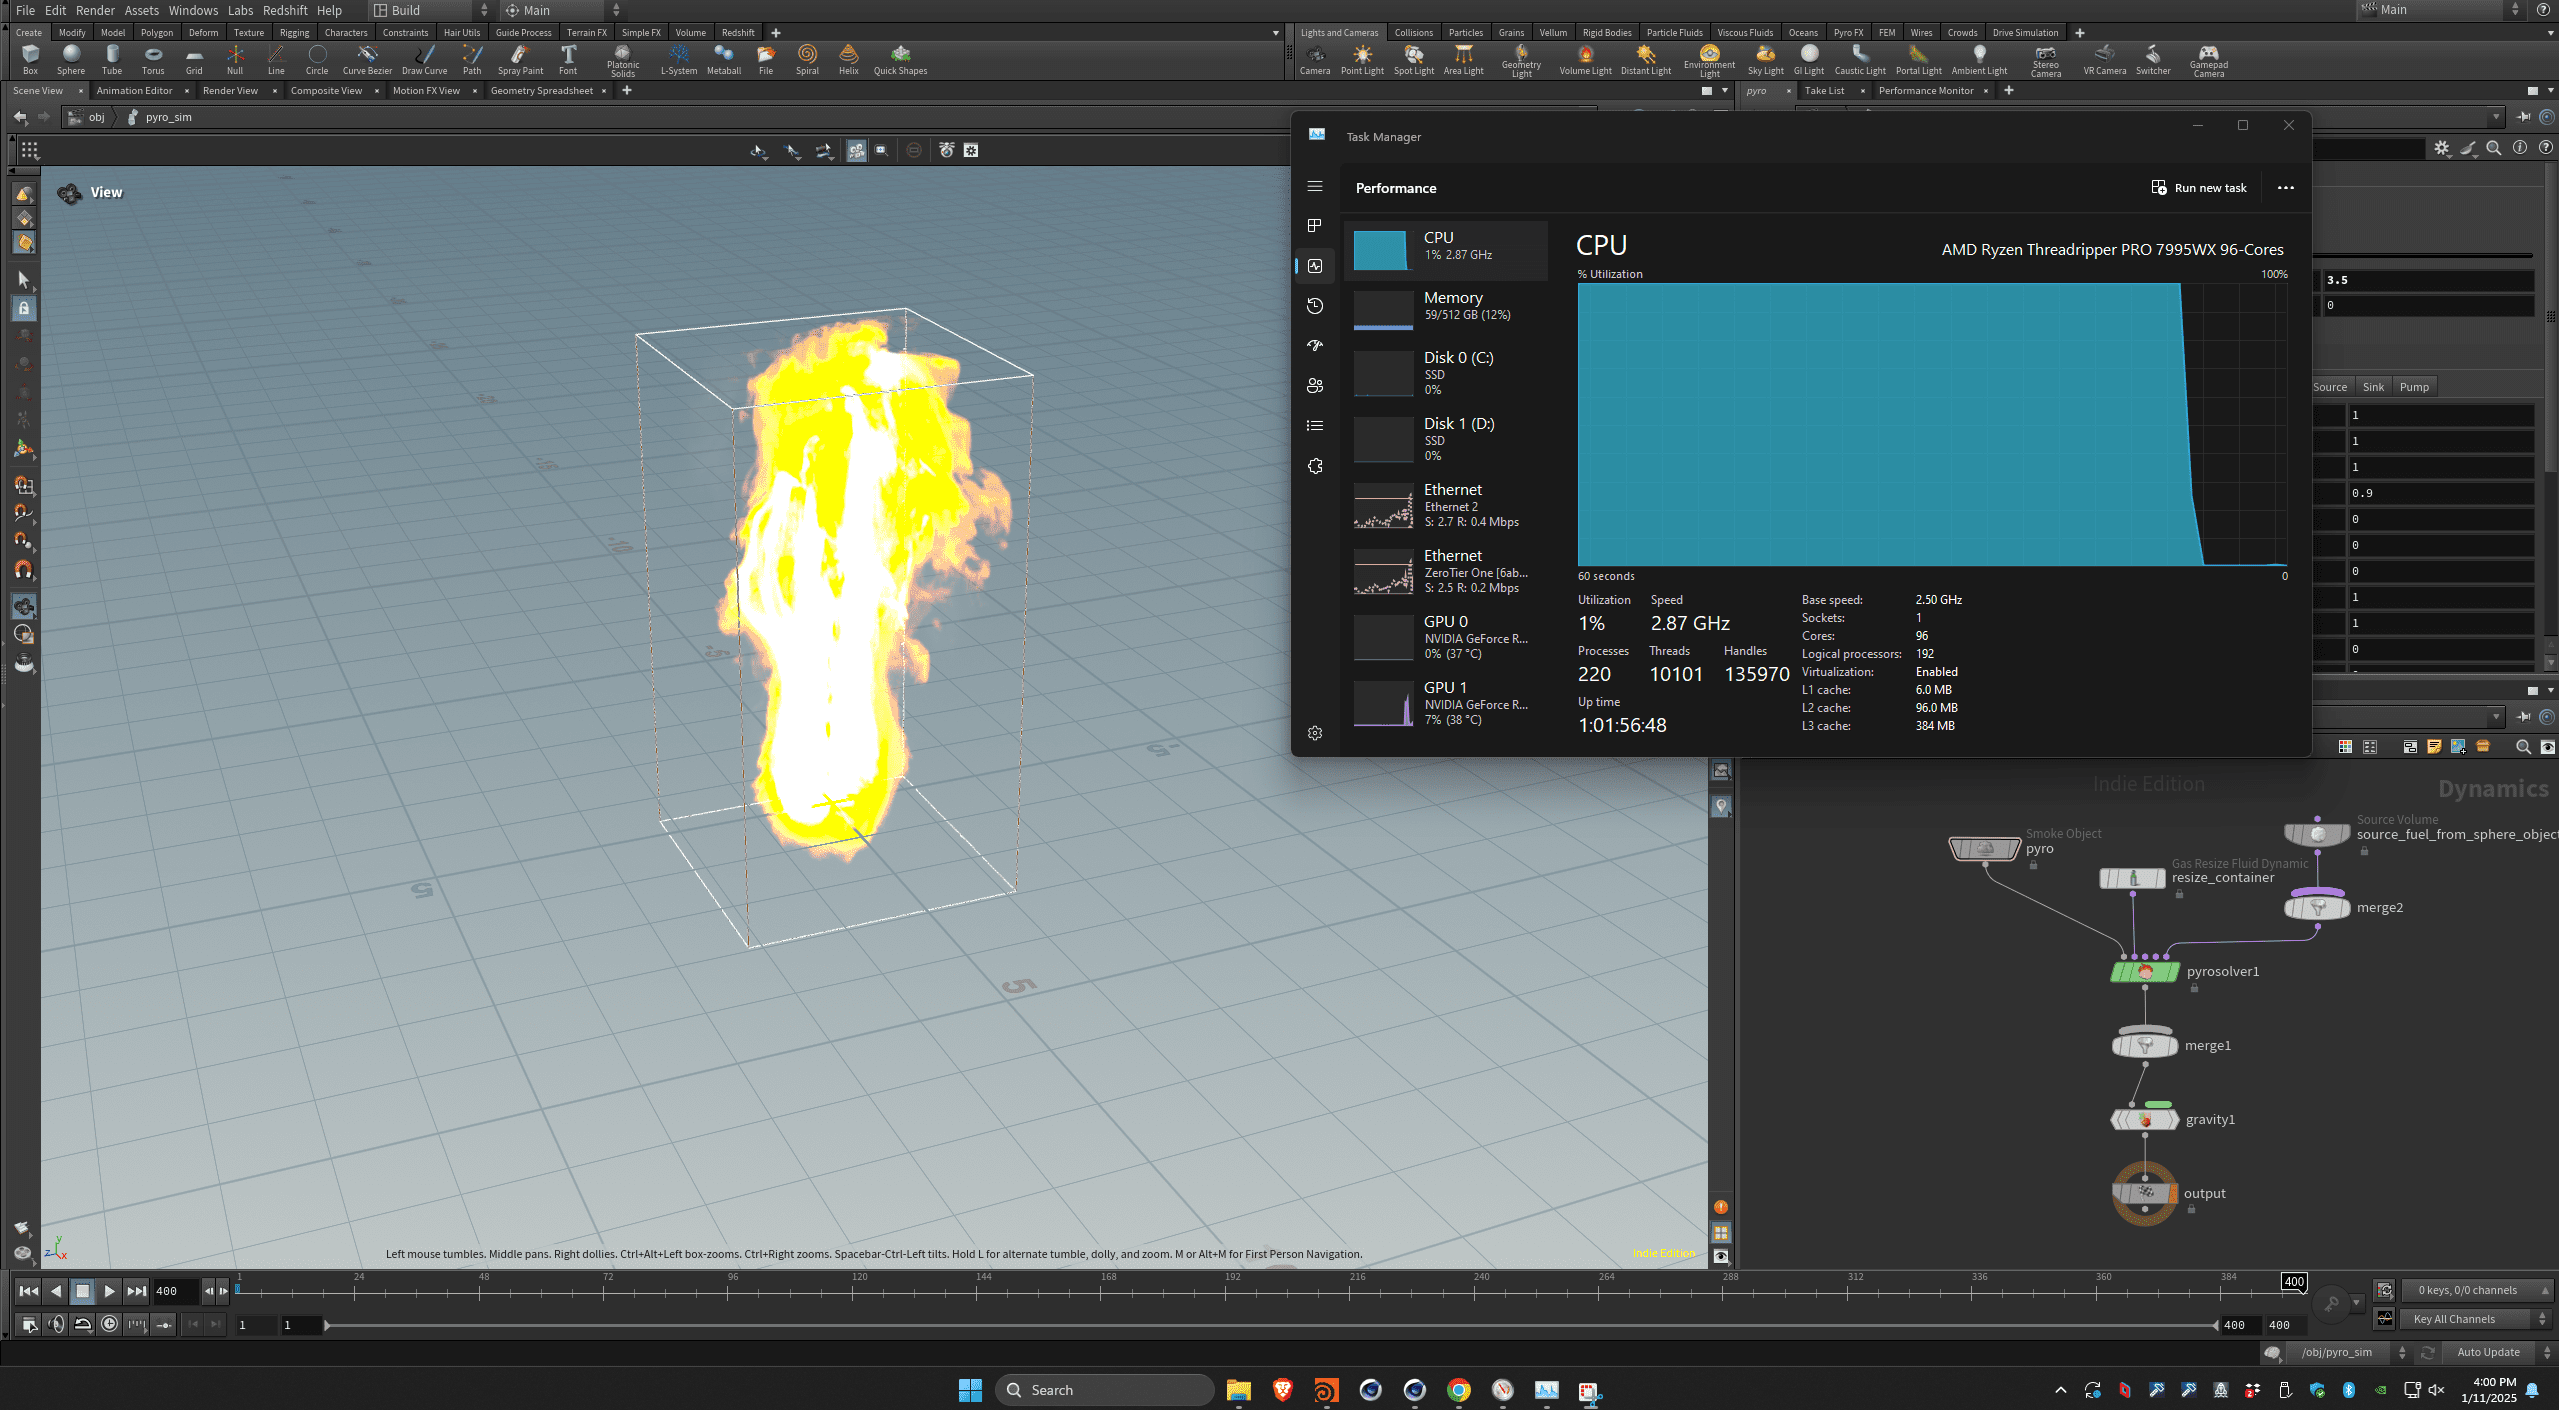
Screenshots of Houdini Flip, Grain, and Pyro benchmarks
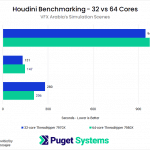
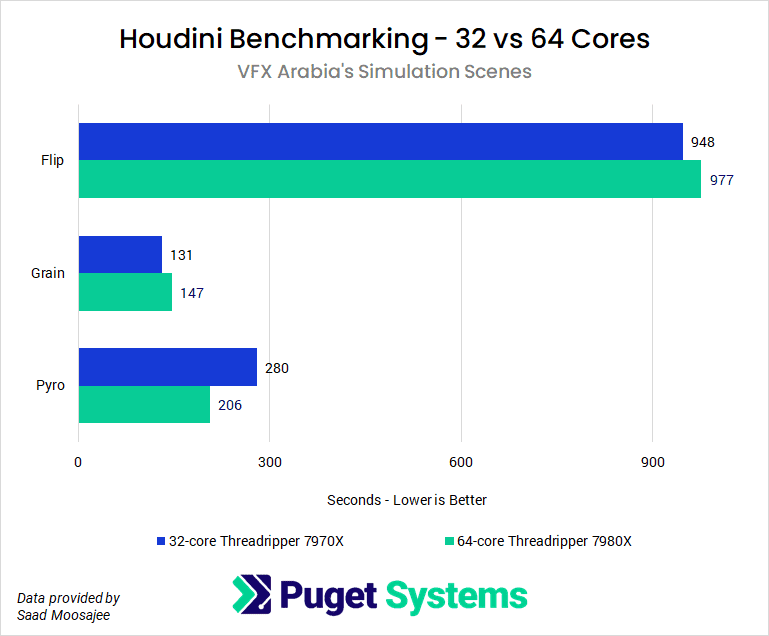
For those of us used to adding more GPUs into the computer to speed up rendering, it is important to note that simulation in Houdini will not always scale linearly with more CPU cores. Comparing the results of the Threadrippers supports this: in the Flip and Grain simulations, the 32- core slightly outperformed the 64-core and 96-core CPUs – whereas in the Pyro simulation, the 64-core was fastest, followed by the 96-core and then the 32-core.
System Image
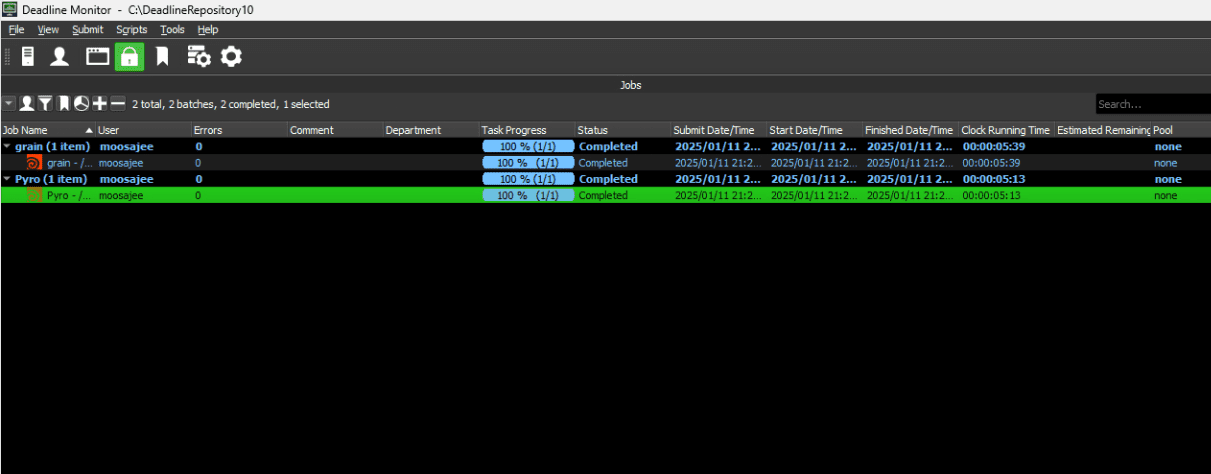
The results support what I mentioned prior: clock speed is most helpful in more immediate tasks like look development, whereas core count is more valuable when working on larger productions that need scale. My tests from Deadline best illustrate a use case of the scale offered by the 96 core. In this setup, the 192 threads of the CPU are split into two ‘workers’ (48 cores, 96 threads per worker) each of which runs its own simulation job, allowing for a parallelized workflow.

In this test, Grain and Pyro are run at the same time, with Pyro finishing after 306 seconds and Grain finishing after 324 seconds, yielding a total simulation time of 324s. Compare this to the linear workflow where Pyro finished after after 230s and Grain after 182s, yielding a total simulation time of 412s, the total time of simulating is already faster when working parallel.
Image
From experience, the biggest advantage of parallel workflow is not just speed, but the option to get two simulations back somewhat concurrently. Most of these test simulations were quick, but when jobs go into the 20- or 30-hour range, having two finish at relatively the same time versus having to simulate one, wait for it finish, and then simulate another can make a big difference.
Applying These Insights
Below are some high-level recommendations that take these insights into account. It’s important to keep in mind that there’s no one-size-fits-all solution for hardware in Houdini – but by understanding the trade-offs, you can determine what best aligns with your use case.
- Heavily Simulation-Focused Artists: Might lean toward a higher core count CPU and more RAM for quicker solver times, ensuring large Pyro or FLIP simulations run efficiently.
- Generalists and Lookdev Artists: May prefer fewer but faster CPU cores, a high-performance GPU, and fast storage speed for iterative workflows and viewport interaction of heavy caches and geometries.
- Studios and small teams: May want a machine that can work as both a Workstation and a Render Farm. A mid- to high-core-count CPU offers versatility – good for both day-to-day artist tasks and potential network rendering – while high memory capacity (128GB or 256GB of RAM) allows for Deadline render farm usage, splitting a single system into multiple render workers.
Happy Rendering!
Looking for a Houdini workstation?
We build computers tailor-made for your workflow.
Need advice? We can help!
Get in touch with one of our technical consultants today.